
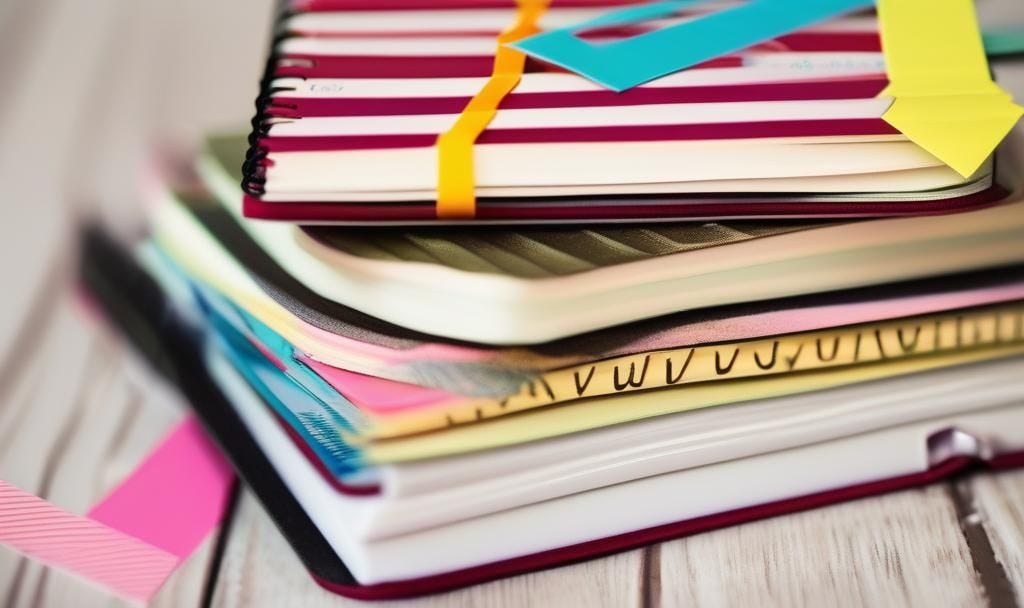
‘Tis the season! The season of planner overwhelm. Look at one and the computer bots will send you hundreds. They all look so similar, so complicated, and yet which is the perfect system for you? If you choose wrong, that $50 planner will be in the trash by February and your all-important things-to-do right alongside them in the bin of regret.
It doesn’t need to be so complicated. The real key to productivity isn’t the tool. It’s the process. This is the process I built for myself over the years. I’ll include the tools I used, but they are free and low effort. I have used all the expensive tools and some of them are incredible. But you don’t need those to get things done.
All you really need is:
A notebook and pen
10 minutes a day
<30 minutes once a week
30 minutes once a month
30-60 minutes once a quarter
My journey
As a young manager, I was overwhelmed. Overwhelmed with the number of things to keep track of, tasks to get done, and goals to achieve.
It wasn’t just my corporate job either. I was in school at night to finish my MBA and had two young children.
I went into a productivity journey that would last the rest of my corporate career. A black hole of advice about complicated systems and tools. All the experts seemed so confident in their advice, so sure of themselves, so accomplished.
Yet none of the advice ever seemed to fit my situation. I didn’t want to learn a bunch of new tools or commit to expensive planners every year. Every year, I experimented with new tools or planners. Every year, I found something about my new system that didn’t work.
Eventually, I learned the pieces of every planner and task tool that worked. I started building my own based on what I’d learned.
My set-up: the tools
You need three basic pieces to any system. A notebook, an online calendar, and a master task list. Here I’ll show you how I set up my notebook and explain the calendar and task list. I’ll go through how I use this in the next section.
Notebook: A single place to write stuff down.
Whether I’m using a physical notebook or an electronic document, I use the same general spreads that I show here. They are simple to draw by hand so there’s no excuse to procrastinate. Electronically, I build it once and duplicate whichever pages I need.
Paper: This is whatever notebook makes you want to pick it up. For me, this varied based on my role at the time. Sometimes I needed the space of a full-sized spiral notebook. Some months included heavy travel so something small and portable was a must. I prefer dot-grid but lined is fine. I like to have the pages numbered, but it takes 15 minutes to add numbers yourself. Whatever style or brand, just make it something you’ll be happy looking at every day for at least 3 months.
Electronic: These days, I use Goodnotes on an Apple iPad with an inexpensive stylus. Mine is a $22 Hatoku from Amazon. (Eventually I may splurge on a real Apple pencil, but since I don’t draw, this one is a good daily writer.)
If you prefer, you can just as easily use any online notebook tool, even a Google or Word doc. As long as it’s as easy to access as a physical notebook, it will work.The setup:
Index: The first few pages of a physical notebook should be reserved for an index. If you are doing something electronic, either mimic that or use bookmarks to create an index for you. I don’t index every page, only the pages I know I’ll want to reference again later. I usually don’t even do that until my weekly review.
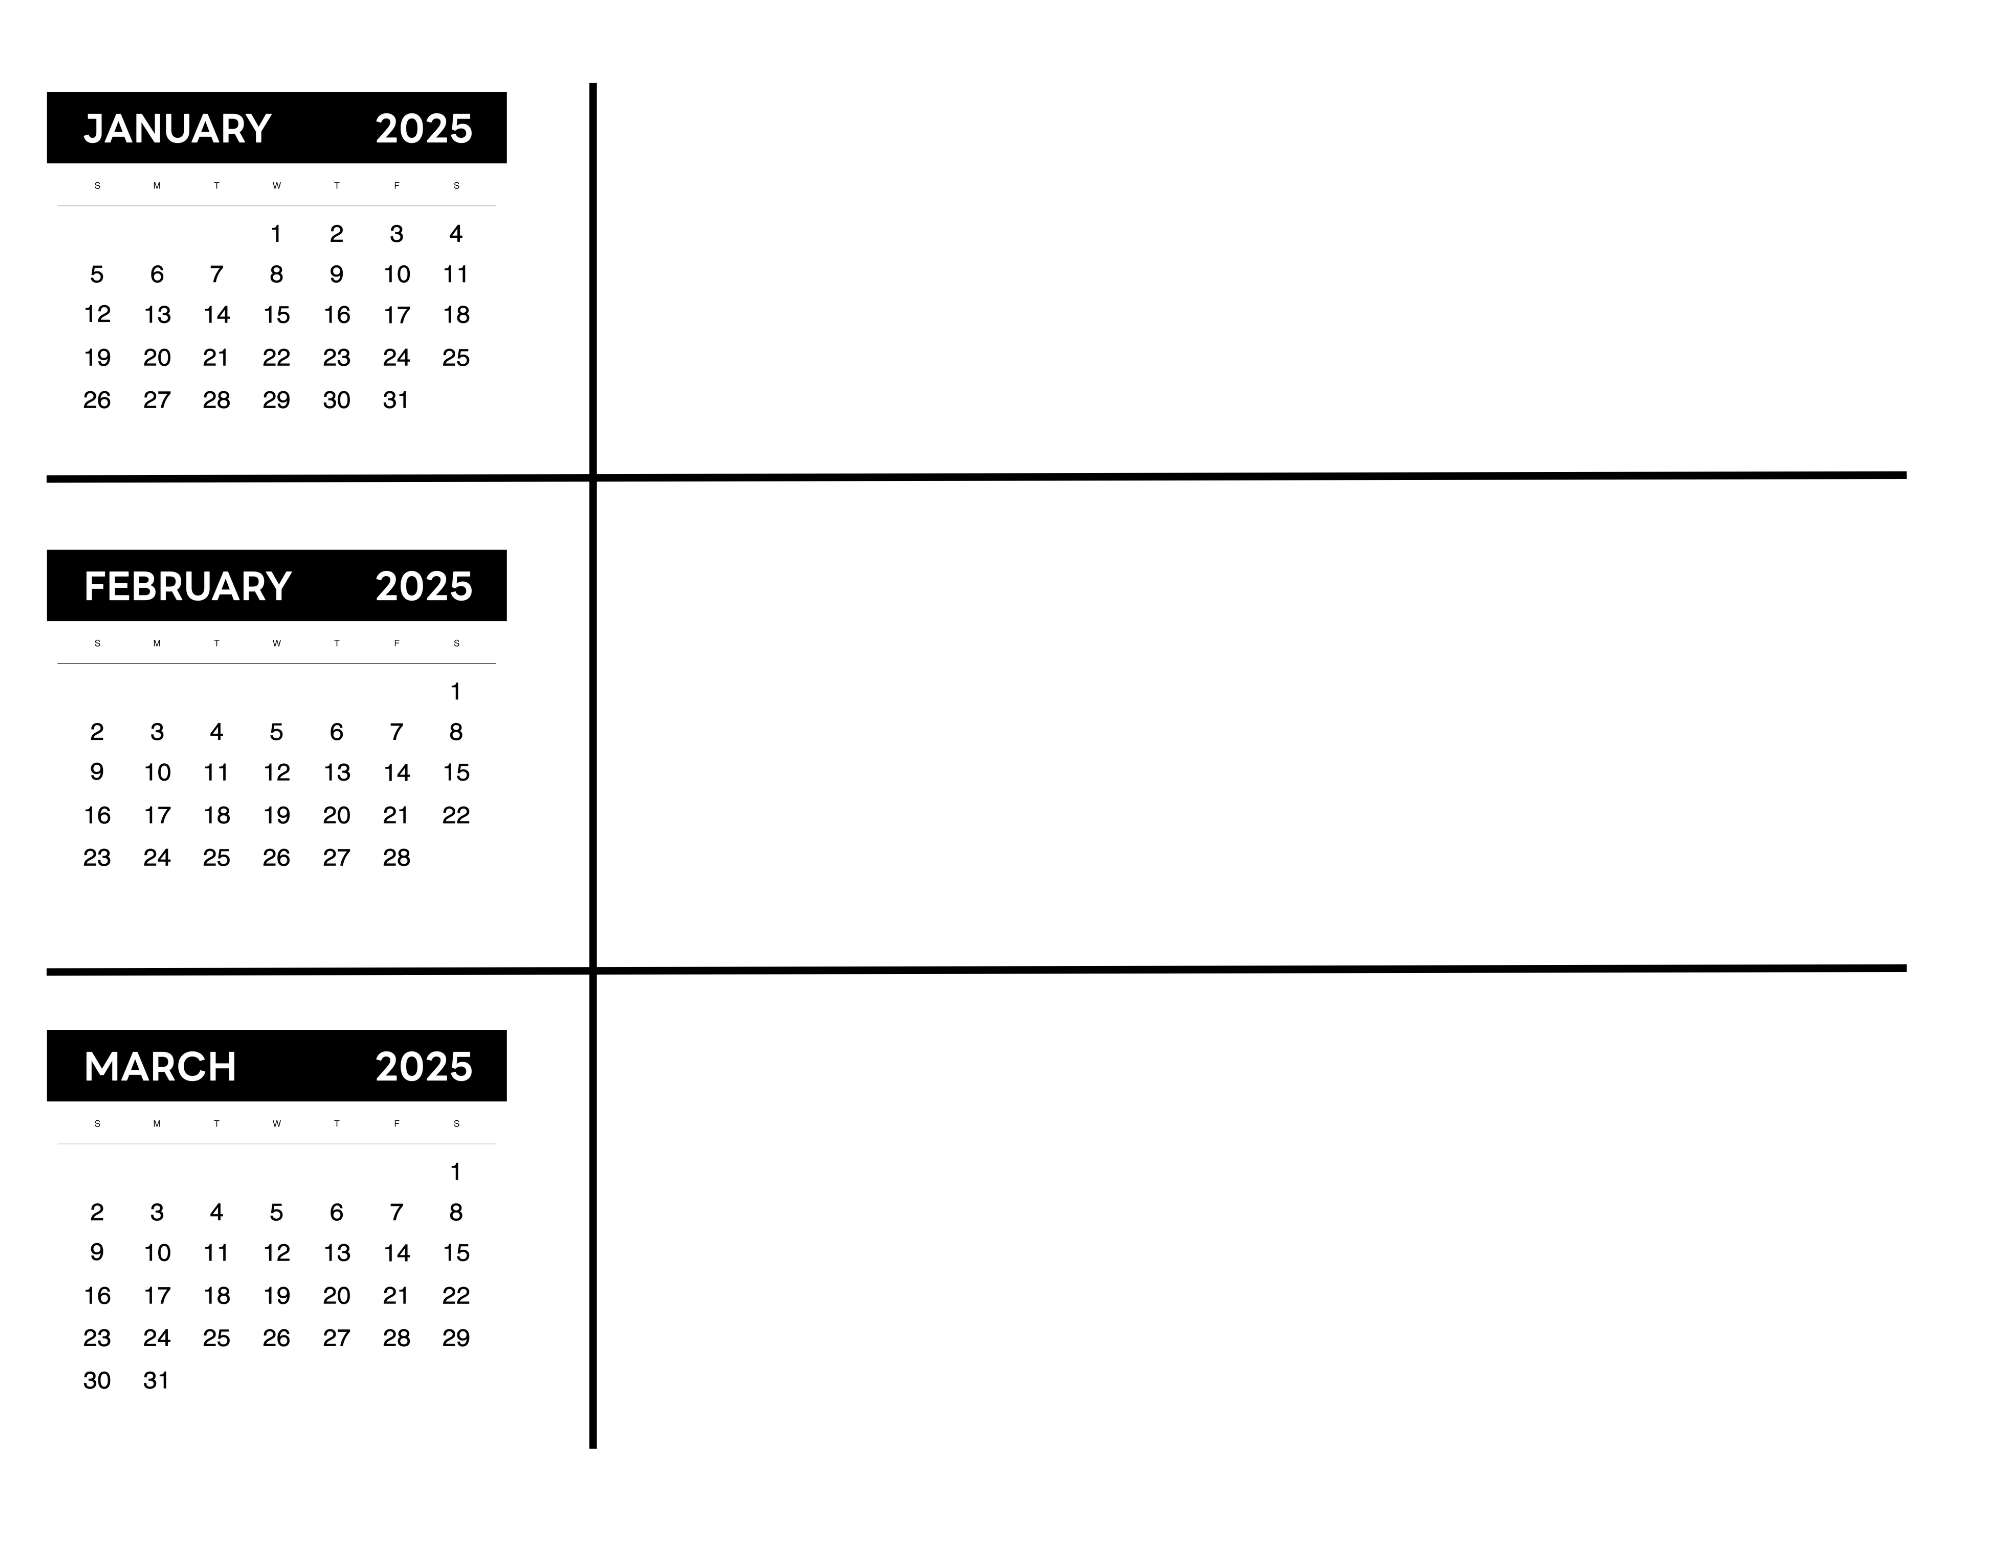
Monthly overviews: I like to have a monthly overview next, usually just a calendar plus some areas for big monthly stuff like birthdays, special meetings, vacations, etc. For physical notebooks, I general print out and paste in the calendars. (Good free printable calendars are available here: printable calendars). Electronically, I copy these into Goodnotes as a template.

Monthly calendar spread by Author Weekly overviews: Next is the basic weekly pages. This is the guts of my system. I only add the upcoming week each week. That way, I can have as many pages as I want for notes right after it. If something is dated past the next week, it either goes on the monthly pages or in the master task list. Again, you can mimic this by hand very quickly.
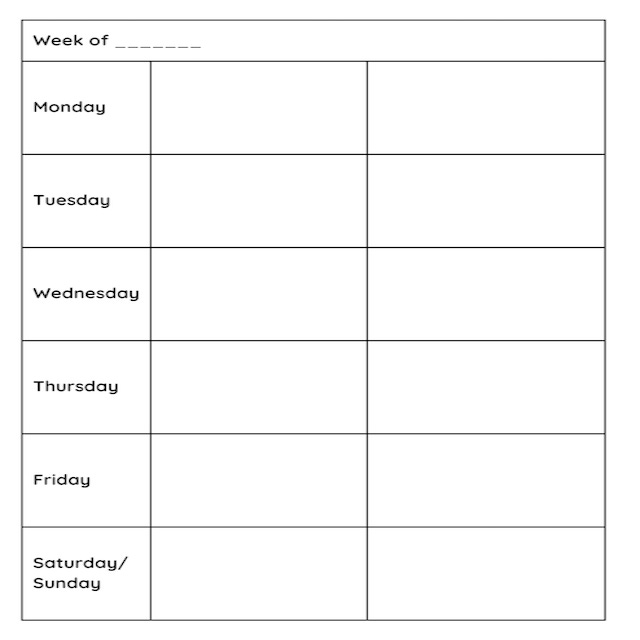
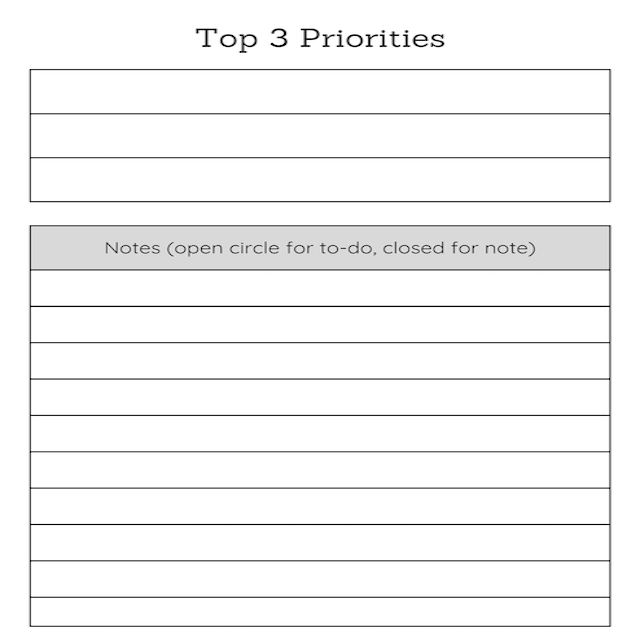
Images by Author


Online calendar: A place to store all your appointments.
Because appointments are often shared with others, I find an online calendar essential. When I worked in corporate, we used Outlook for all scheduling, so I defaulted to that for my online calendar. These days I use Apple’s calendar, which allows me to combine multiple calendars into one view.
Master task list: A place to keep a running list of all things that need to be done.
Paper: you can keep this list in your notebook. I often flipped my notebook upside down and used the last page as the first page of the task list. This kept things quickly accessible. You could just as easily dedicate a section of the notebook, but I worried that I wouldn’t allow enough pages. (Tip if you do this: don’t transfer all the details of a task. Just write a brief summary of the thing to do and reference the page number where the details are. Ex: Finish the monthly widget report, p. 42)
Electronic: use whatever you are already using. There are so many of these tools out there but use what you know already. Don’t make this harder than it needs to be. Just choose one. Apple Reminders or Notes will work, as will a simple Word or Google document. You don’t need to transfer all the details! Just reference where the details are. (Ex: Finish the monthly widget report, p. 42)
In my corporate life, we used Wrike as our shared project tool. I created a personal space in Wrike so everything was in one place. Whatever you use, commit to a single tool.
Optional but helpful
If you go with a paper notebook, I recommend getting some Repositionable Page Tabs. I use this to help me quickly find my current spot in my notebook, along with anything I’m currently using frequently. Because they’re repositionable, I never need (or want) more than 3 at a time. You can use bookmarks or paperclips, but these were simpler and more reliable for me.
Before learning the process: choose your timing
Is now the right time for you to learn and build a new habit?
The key to any productivity system is not the tools, it’s the process.
I didn’t want that to be the answer. I wanted to pay to make it easy. I spent so much money searching for the perfect tool. The planner that would do the work for me.
The tool will not do the work for you. No special knife will make you a great chef. No magic hammer will build an amazing table for you. The tools make you stronger, but the real strength comes from your effort. If you want to be more organized, you have to do the work.
The good news is that the work is simple. Don’t overthink it!
There is a cadence to good time management. It’s a habit. A strength. A skill that you can learn quickly. But it must be something you commit to doing for a concentrated time.
It will be frustrating and confusing when you start, just like any other skill you’ve learned. If next week is the busiest week of the year for you, don’t try to do this then! Choose a more typical/normal week. Or a week where you expect your workload to be lighter.
End of year is often a great time to learn this habit, but people often put it off to the beginning of the year. I always found the beginning of the year to be the worst time to build a new habit, even though that’s when most people start new things. Especially in a corporate environment, the holidays are usually pretty slow. But the first of the year is when everyone wants to get going.
Rather than make a “I’ll be more organized” New Year’s resolution, use the last few weeks of the year to build this new habit. You’ll go into the year calmer and more organized.
The process
Daily: Clear your desk and your brain (don’t skip two days in a row!)
At the end of each day, take 10 minutes to transfer any stray information into your notebook or task tool. Get rid of all the random scraps of paper and post-its that you’ve accumulated throughout the day.
This was the hardest step for me. Thankfully, I found skipping one day was manageable. But skip two days in a row and you will be overwhelmed. Take the ten minutes to save yourself a lot of stress and frustration later.
Weekly: Clear your mind and your notebook
Once a week, same time and place preferably since that’s how habits are built, take 20-30 minutes to clear out the week and think about next week.
Clear it out: Any tasks created or leftover from the week get eliminated if they’re no longer important, moved to next week if they’re important enough, or your master task list if they’re “someday” tasks.
(Pro tip: instead of checking off a moved task, just put a forward arrow in the circle to indicate it’s been moved.)Note it: Add any important pages from the week to your index.
Prepare: Set up your next weekly spread. Pencil in any meetings that you need to work around.
Prioritize: Review your tasks for key priorities for next week. Transfer to your weekly spread and identify the top 3 things that must be done to make next week a success. I know, everything’s important. You won’t get more than 3 things done though, not at a high level of quality. Don’t kid yourself.
(Pro tip: If you find smaller tasks building up, one of your top 3 can be to clear out all the small stuff. I often found I needed to block off an hour every 2-3 weeks to get through all the 10-20 minute tasks that never seemed to get priority. That hour was sometimes one of my biggest priorities.)
Monthly: Capture your accomplishments
This is basically the same process as the weekly review and can easily be done with your weekly review at the end of the month. It’s just a larger scale. You identify priorities for the next month instead of the next week.
The difference is that you are reviewing all the prior weeks of the month and capturing the highlights. Use an actual highlighter and review what you accomplished. Then compile all those highlights. Compare back to your quarterly/annual goals and see if you made the progress you expected. Make any adjustments in higher level priorities and commit to the most important three things you can accomplish next month. Transfer these back to your monthly spread.
All those highlights and progress? Write a monthly report, even if your boss doesn’t require it. You need to remember what you’ve accomplished. You need your boss to understand what you’ve accomplished. A simple list of what’s you’ve achieved will help you feel more in control and will help you show your value.
Quarterly: Review, plan, celebrate
Your quarterly review is also much the same as the weekly review and the monthly review, just on a grander scale. Spend more time to understand how you are doing against your larger goals. Think more strategically about what’s coming up, what time you will have to push your more important goals forward, and plan how you will spend the next three months.
This is also a good time to look at your own productivity process. What’s working? What’s not? The whole point of any productivity tool or process is to help you accomplish what’s important to you. One size does not fit all. Only by reviewing, refining, and tweaking will you build your own success.
Choose the tools you will use and a process you can commit to for 3 months.
Clear your desk at the end of the day.
Clear your mind at the end of the week.
Capture your accomplishments at the end of the month.
Celebrate and open your mind at the end of every quarter.
Good luck with your journey. Let me know what questions you have or what tips you have!
Supporting articles and videos
My previous article on productivity at different levels: https://substack.com/home/post/p-147878048
The first of several videos on using the Full Focus Planner. If you need a pre-built planner tool, I highly recommend this one. It is undated so you can start anytime. Even if you don’t purchase the planner itself, the process is solid and will give you a lot more detail.
Full Focus PlannerThe original Bullet Journal video. This is the video that first taught me that a handmade planner could be better than a store-bought one. Be careful here! Bullet Journaling has become a social media sensation. Because of the free structure, creative people have flocked to it and love to share their beautiful spreads with you. You don’t need to be fancy! As this video shows, this was originally a way to simplify planning. Not a way to increase your Instagram following.
Bullet Journal OverviewI highly recommend Canva for building your own spreads electronically. The free version gives you access to a lot of different planner formats you can download and use on your iPad or print off. By trying different formats, you’ll quickly learn what works best for you. Set up an account, type “planner” in the search field and explore all kinds of options.